
I was exploring the possibility of changing the guest password on a UniFi controlled Wi-Fi network. It turns out to be relatively straightforward. I then decided to have a device that would show the current password in a QR code format that allows a guest to easily log in with their phone. That wasn’t quite as simple.
Background
This was actually a project for work but as I also have a UniFi WiFi system at home I decided to do it there first.
The idea was to automatically change the password on the Guest WiFi network each day. Any guest can then use a QR code to easily log in to the network.
There are 3 components - the password ‘rotator’, a lightweight web server and the display.
The Password Rotator
Written in C#, this component is a console application that is intended to be called by the Windows system scheduler. It runs on my main PC which is usually on all the time. I scheduled it to run just past midnight.
The UniFi Controller exposes a REST API. The key endpoint for updating a WLAN password is
PUT /api/s/{site}/rest/wlanconf/{wlan_id}
The Password Rotator generates a new, random password and makes this call with the password in the payload. Of course, the session has to be authenticated first and this is done by creating a username/password combination on the Controller. All the configuration and options are stored in a .json file with the Rotator executable.
{
  "UniFi": {
    "ControllerUrl": "https://192.168.X.Y",
    "Username": "joe",
    "Password": "put your password here",
    "Site": "default",
    "GuestNetworkName": "guest",
    "ControllerType": "UniFiOS"
  },
  "PasswordMode": "WordBased",
  "WordlistPolicy": {
    "WordCount": 3,
    "Separator": "",
    "Capitalise": true
  },
  "PasswordPolicy": {
    "Length": 12,
    "UseUppercase": true,
    "UseLowercase": true,
    "UseDigits": true,
    "UseSpecialChars": false,
    "ExcludeAmbiguous": true
  },
  "CredentialServer": {
    "CredentialsFolder": "C:\\GuestWiFi"
  },
  "Output": {
    "SaveQrCodeImage": true,
    "QrCodeOutputPath": "C:\\GuestWiFi",
    "LogPasswordToConsole": true
  }
}
There are options for the password policy, password length and a location to write the generated password to each time the Rotator runs. This is called the CredentialsFolder and is referred to by the WebServer component which is called the CredentialServer
Credential Server
This is a minimal HTTP server (also C#) that serves the current guest WiFi credentials to any device on the local network, on demand.
The Password Rotator writes credentials.json to the configured folder after each password rotation. This server simply serves that file.
It runs as a Windows Service (or console app for testing).
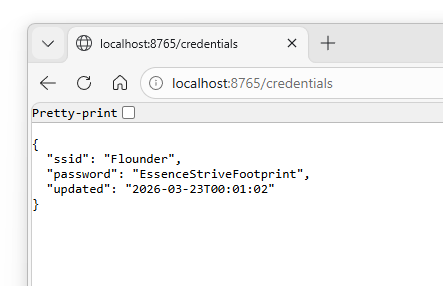
The URL is http://localhost:8765/credentials and this can be tested by opening it in a browser
Now we need something to fetch the credentials and display it.
QR Code Display
My friend Shay gave me an AtomS3R from M5 Stack. Nice one Shay!
I decided to use this even though it doesn’t actually run Windows XP 😊. It is an ESP32 and can be easily programmed using the Arduino ecosystem. The display is also a button.
Here is the operation of the QR Code display system.
- Show cached credentials from non-volatile storage (NVS) immediately (instant on)
- Connect to WiFi in background
- Fetch latest credentials from Credential Server (PC) on port 8765
- If changed, update display and save to NVS
- Button press toggles QR <-> password view, resets sleep timer
- After 30s of inactivity go to sleep.
- Button press wakes instantly; execution resumes
Power consumption
- Active (WiFi on): ~80-160 mA
- Screen on, idle: ~40-80 mA
- Sleep: ~1-2 mA
Expected battery life (2000mAh): days to a couple of weeks
Libraries:
- M5AtomS3 (M5Stack)
- QRCode (ricmoo/qrcode)
- ArduinoJson (bblanchon)
You can see what is displayed on the screen of the AtomS3R using this mockup. Try it with your own WiFi network credentials.
Additional Hardware
Now I had the whole software stack operating (Rotator -> Server -> Display), I wanted to package the display so it was usable. I decided to make an enclosure that would stick to the fridge.
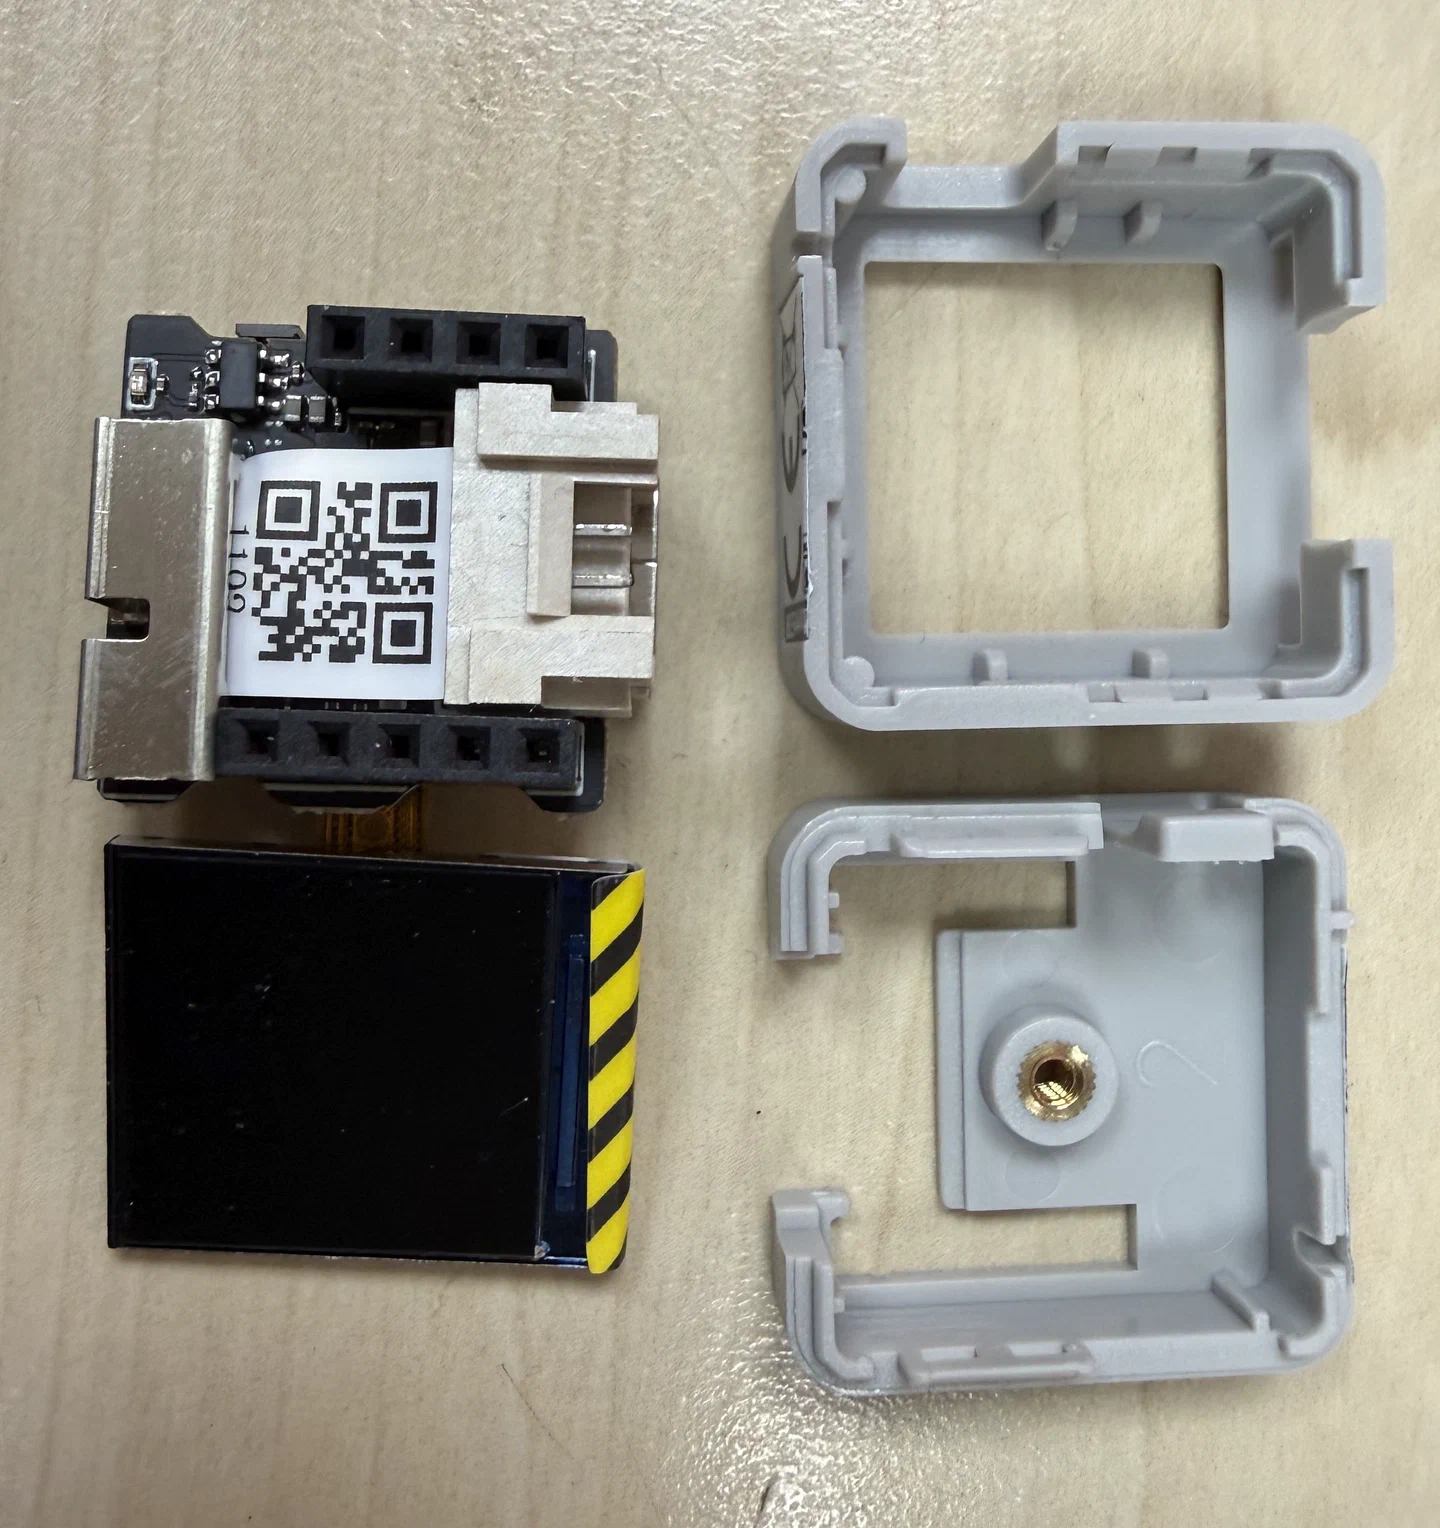
The AtomS3R is tiny and relies on a USB C connector for power - I wanted it to be battery powered and rechargeable as the standby mode was eventually going to flatten the battery. I bought a 2000mAh battery and a USB C charger circuit with regulated 5V output and designed a housing in Fusion
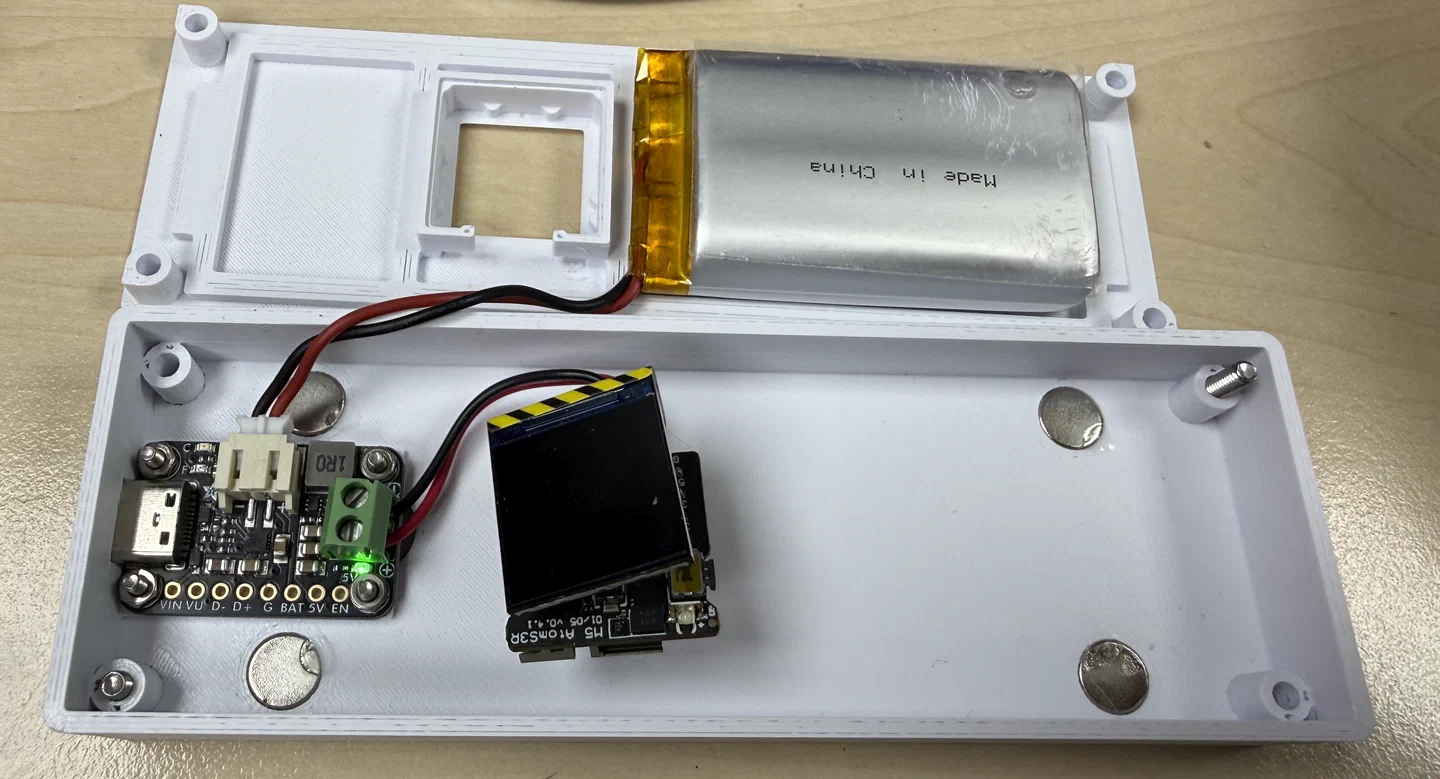
The housing parts are held together using hex cap head screws and has a set of 4 magnets inside which provide plenty of grip onto my fridge. The battery is stuck down using double sided tape and the charger board is connected securely to the base. The Atom mounting is copied from the original housing.
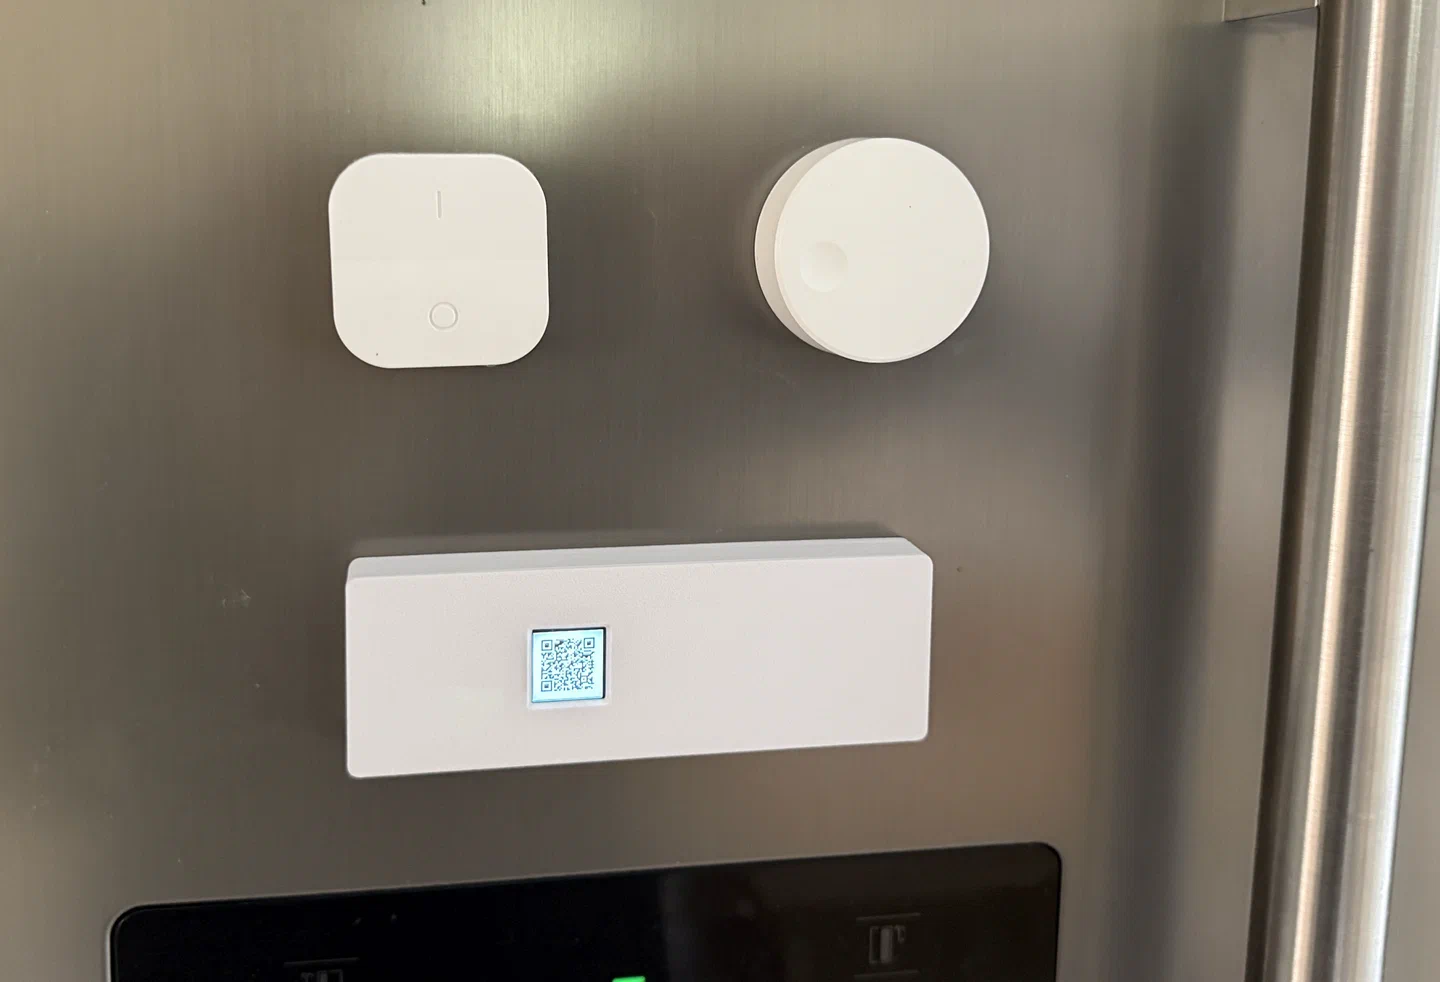
The finished product sort of matches my (older style) Ikea Tradfri controls I have in the kitchen.
Final Thoughts
This is certainly overkill for a domestic Wi-Fi network but it was an interesting project and has its uses within a larger context. An ePaper display would be better from the point of view of battery life but that is not a major concern.