
Saving
Ashley has become a really great gardener recently and can keep multiple plants alive at once. We have had 3 heatwaves already this year and this necessitates her watering the garden a lot. I decided we should try to use rainwater for irrigation. I have some experience with water harvesting; many years ago I tried it and it did not go well. Using lessons learnt, I decided to try again.
Tanking
I set up a 100-litre water butt and while it fills up quickly - even a modest rainfall brims it - it’s equally quickly empty again. Clearly a series of tanks or one big tank is the way to go.
I decided to use an IBC container as a tank. These take up a lot of room but hold 1,000 litres. Lesson 1 is that translucent or white IBCs encourage algae growth so a black tank is preferred. Lesson 2 is that the cage is absolutely necessary. A refurbished black IBC with cage and pallet base cost £87.50. This compares very well - a new 200-litre tank can cost over half as much for a fifth of the capacity.
Filling
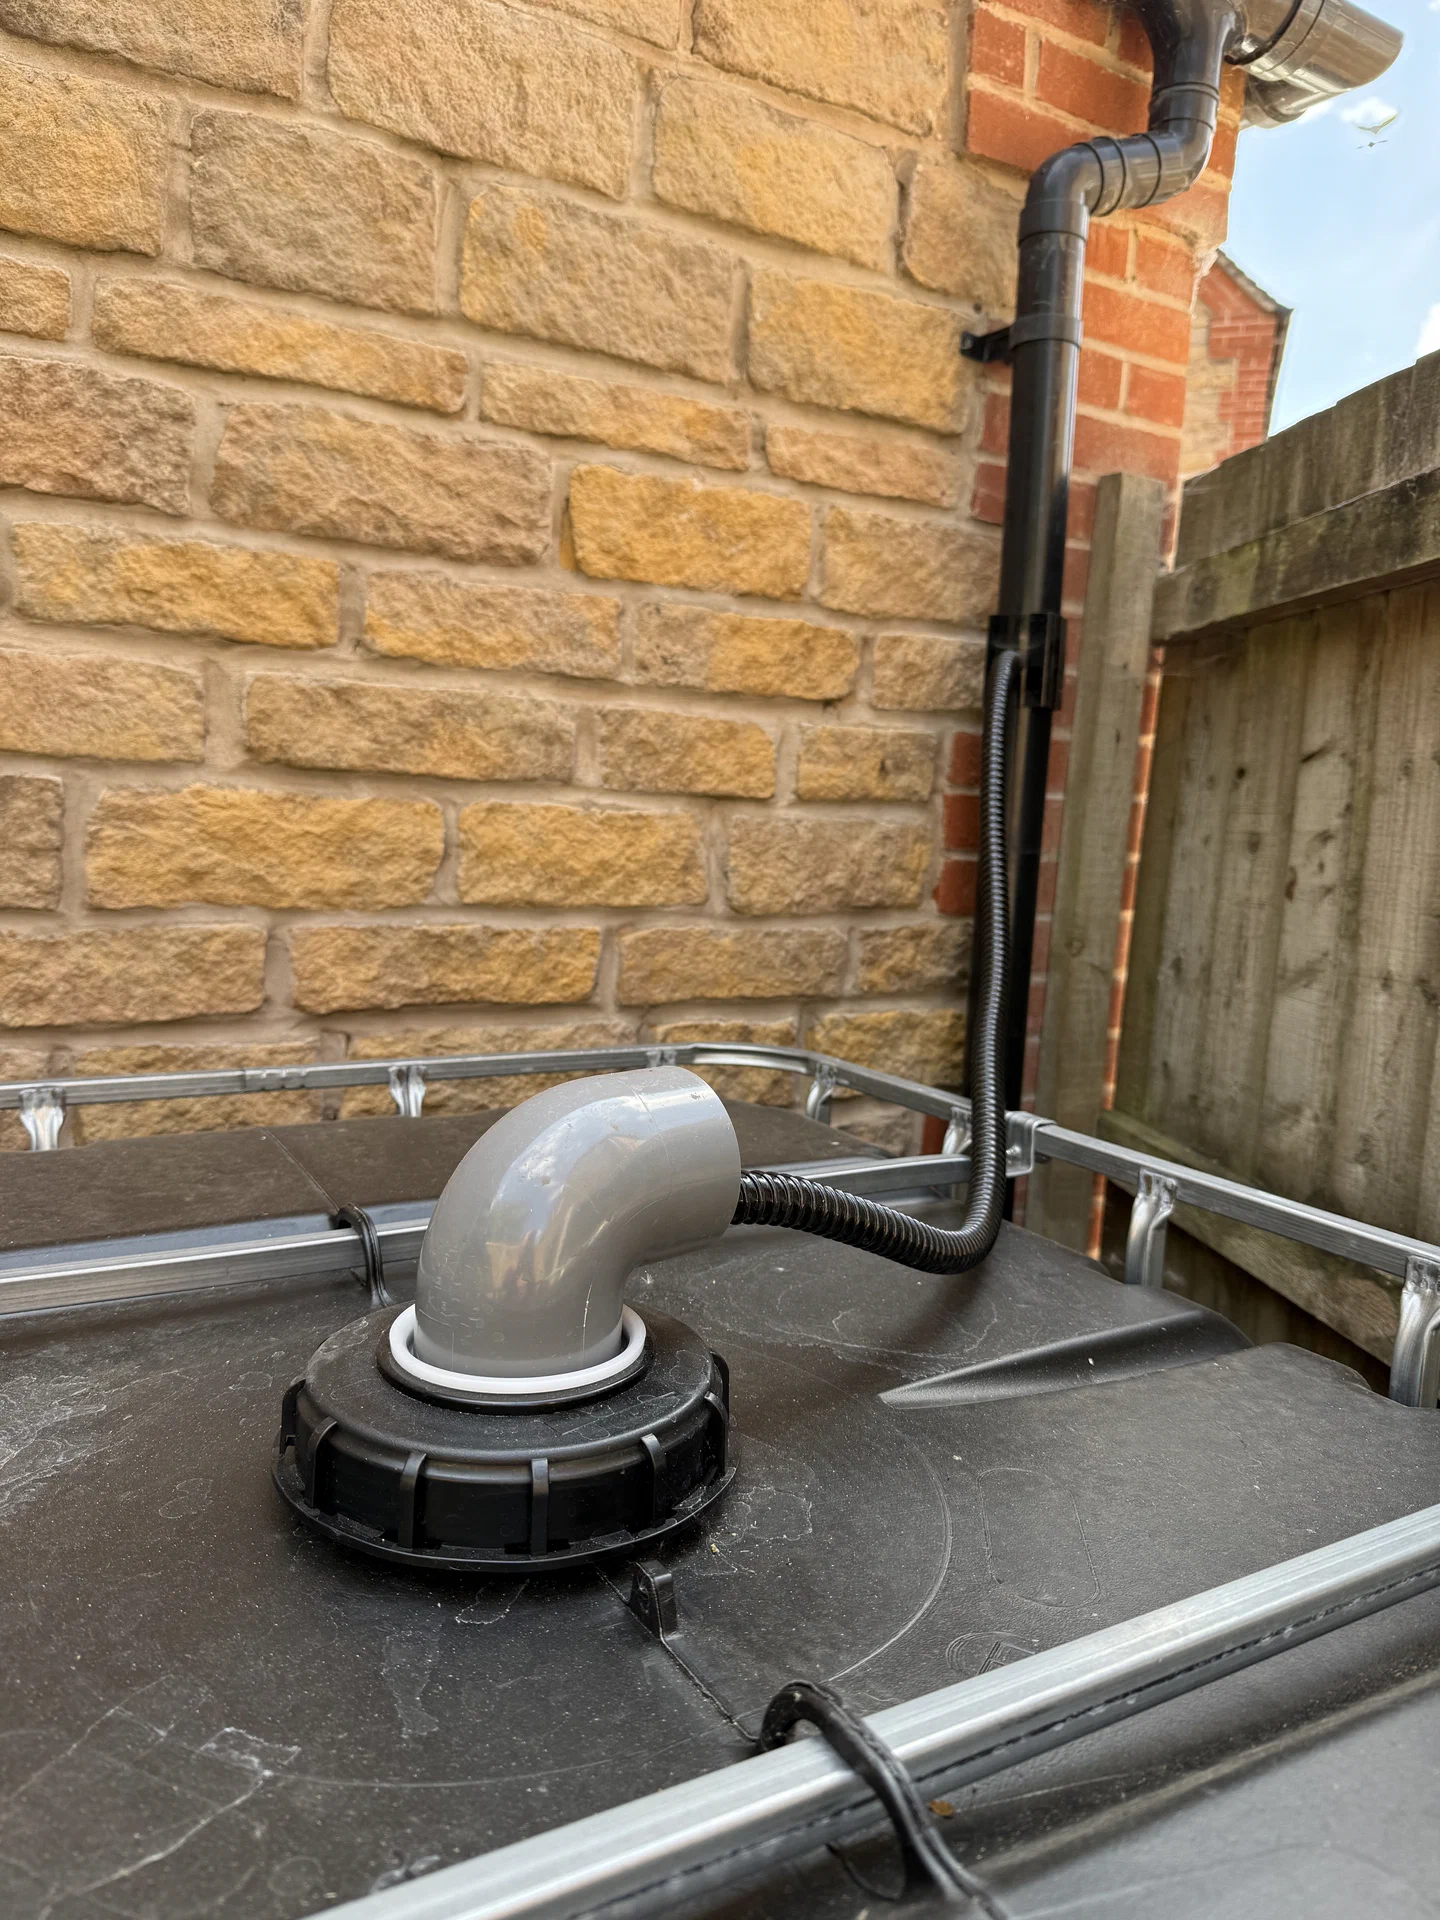
As with the water butt, we are filling from a downpipe from a sloping garage roof. I am using the same kind of water diverter - this drops into the IBC via a pipe with a 90-degree bend and through a filter to catch moss, leaves, and other debris. I am a bit concerned that a lot of water flowing off the roof won’t make it into the tank. I have a plan B that involves using 68mm drainpipe straight into the tank with an overflow system. I won’t know if I need to implement that plan until it rains again.
Pumping
Lesson 3 is that you need to get the water out of the tank with a decent pressure to fill a watering can or use a hose. One way to do this is to raise the tank and let gravity do the work. The water butt sits on a plastic stand about 40cm above ground. Filling a watering can from it is excruciatingly slow. Constructing a stand strong enough to hold the IBC, containing 1 tonne of water, above ground level is more work than I fancied so I decided to use a pump.
Adding a pump became a big part of the project. Lesson 4 is that if it isn’t easy to use, then it won’t get used. I decided I wanted an automatic system that would connect to our existing garden hose. When the spray nozzle is opened, the pump will turn on, deliver water at mains-like pressure and then stop when the nozzle is closed.
To achieve this I used a Trotec electric garden pump with an electronic pressure switch. This sounds simple but involves plumbing and electrical wiring - all of which needs to be weatherproof. Also adaptors. Many adaptors.
Adapting
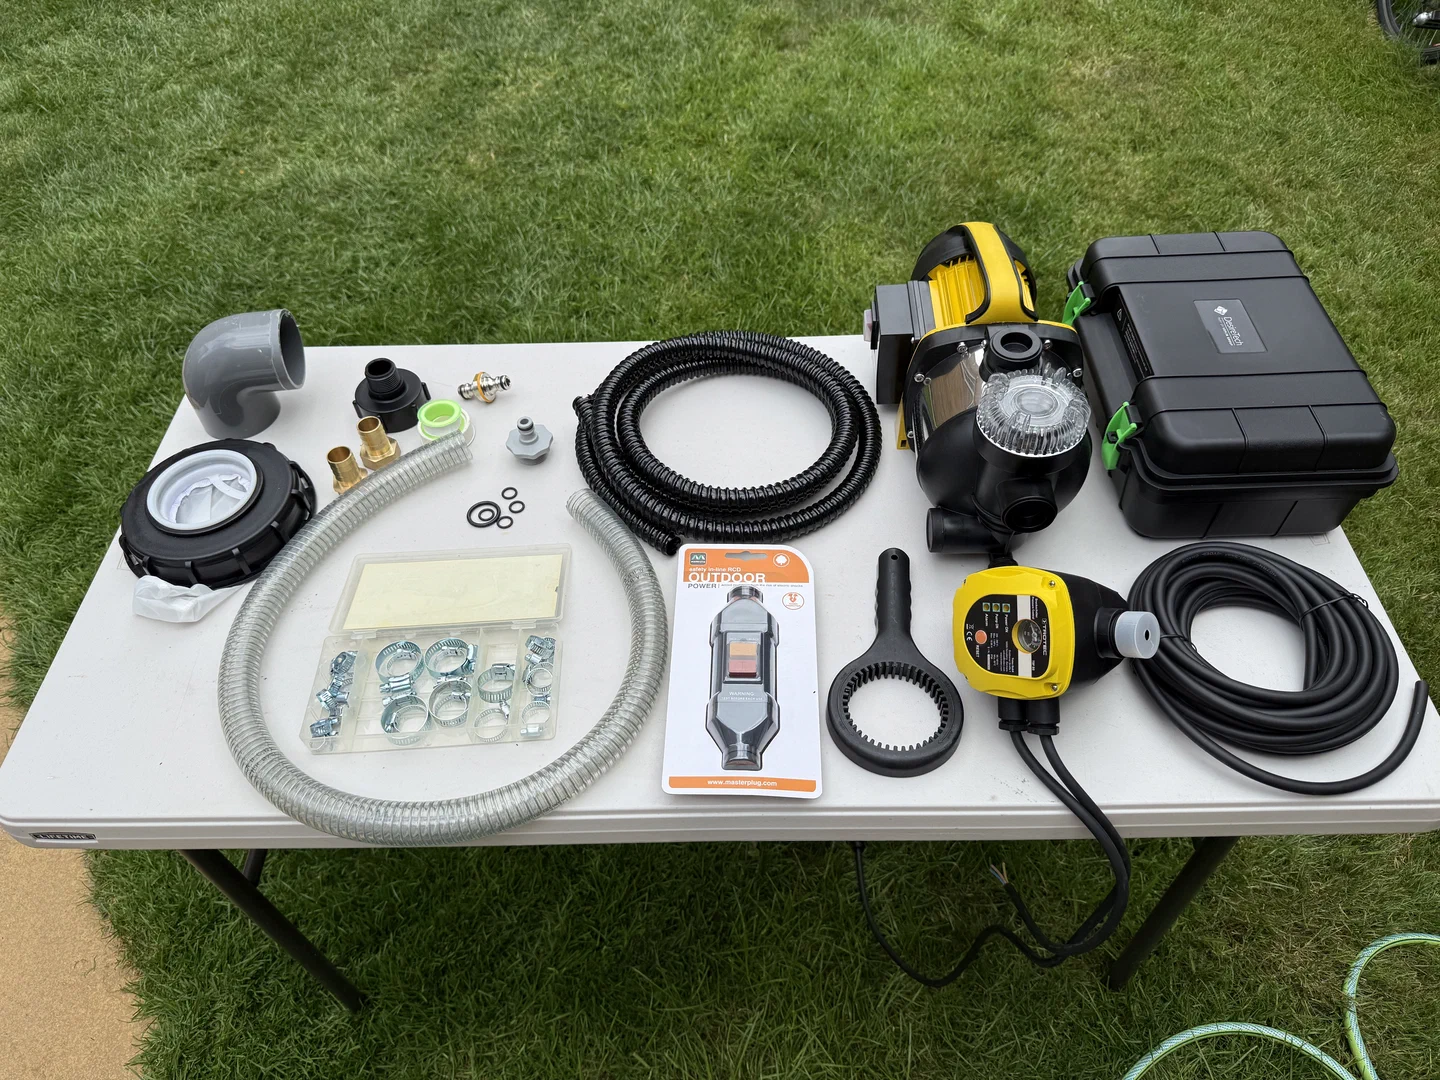
These are most of the components of the pump system including some electrical bits.
Here’s the flow from the tank to the pump: The IBC outlet is an S60×6 male connector. To this we add an S60×6 female to 1" BSP male adapter. Then a 1" BSP female to 25mm barbed hose tail. Then a reinforced 25mm suction hose. Then a 25mm hose to 1" BSP male adaptor - this then connects to the pump’s inlet port which is 1" BSP female.
I won’t go on but there are a lot more. After a lot of PTFE tape, O-Rings, sweat and tears and deploying all my largest spanners, the pump is up and running. It delivers water at mains pressure as advertised and is very quiet for those early-morning watering sessions.
Installing
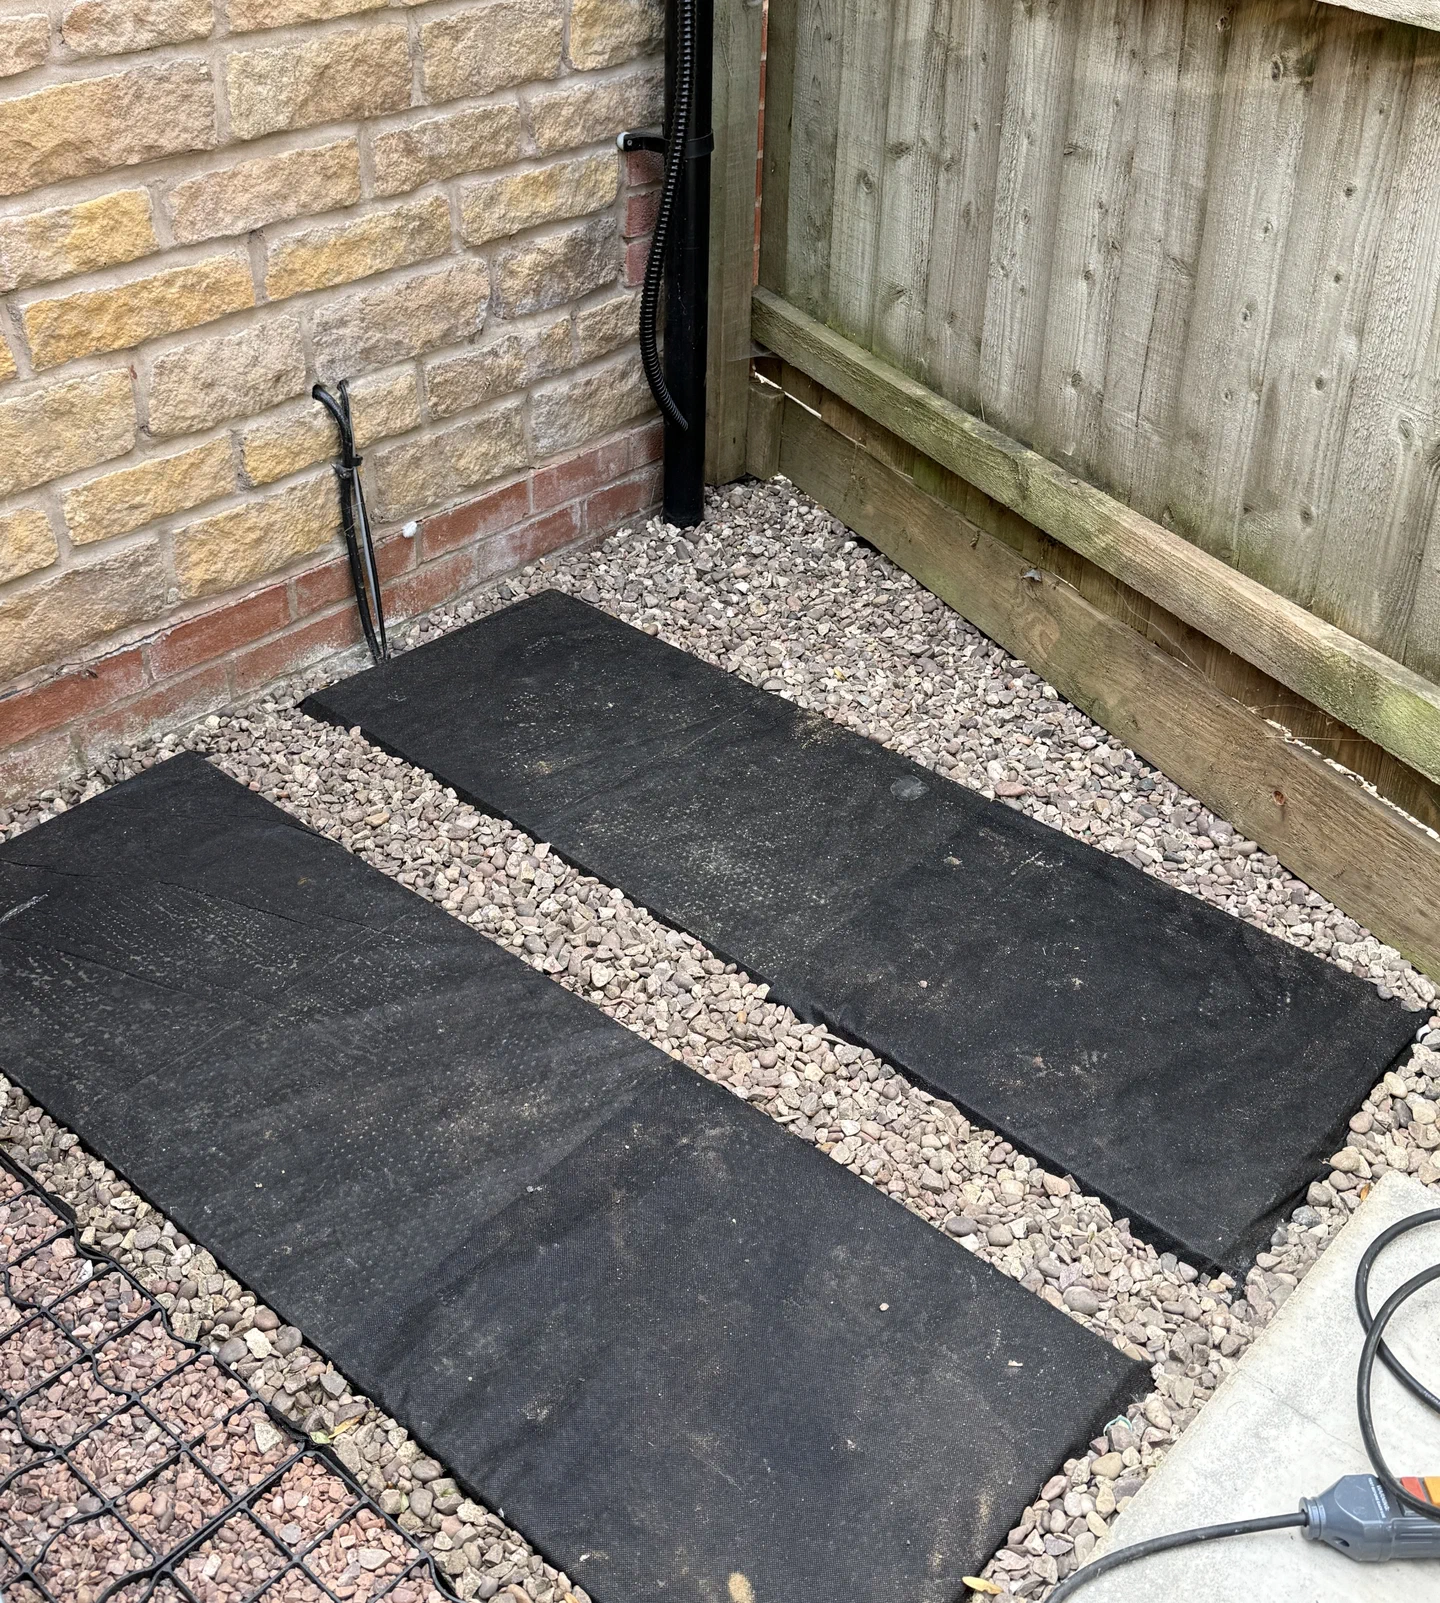
I laid a base made of old patio slabs, then covered the area in weed fabric and filled in with recycled gravel. The IBC is basically a heavy pallet and it sits just fine on the base.
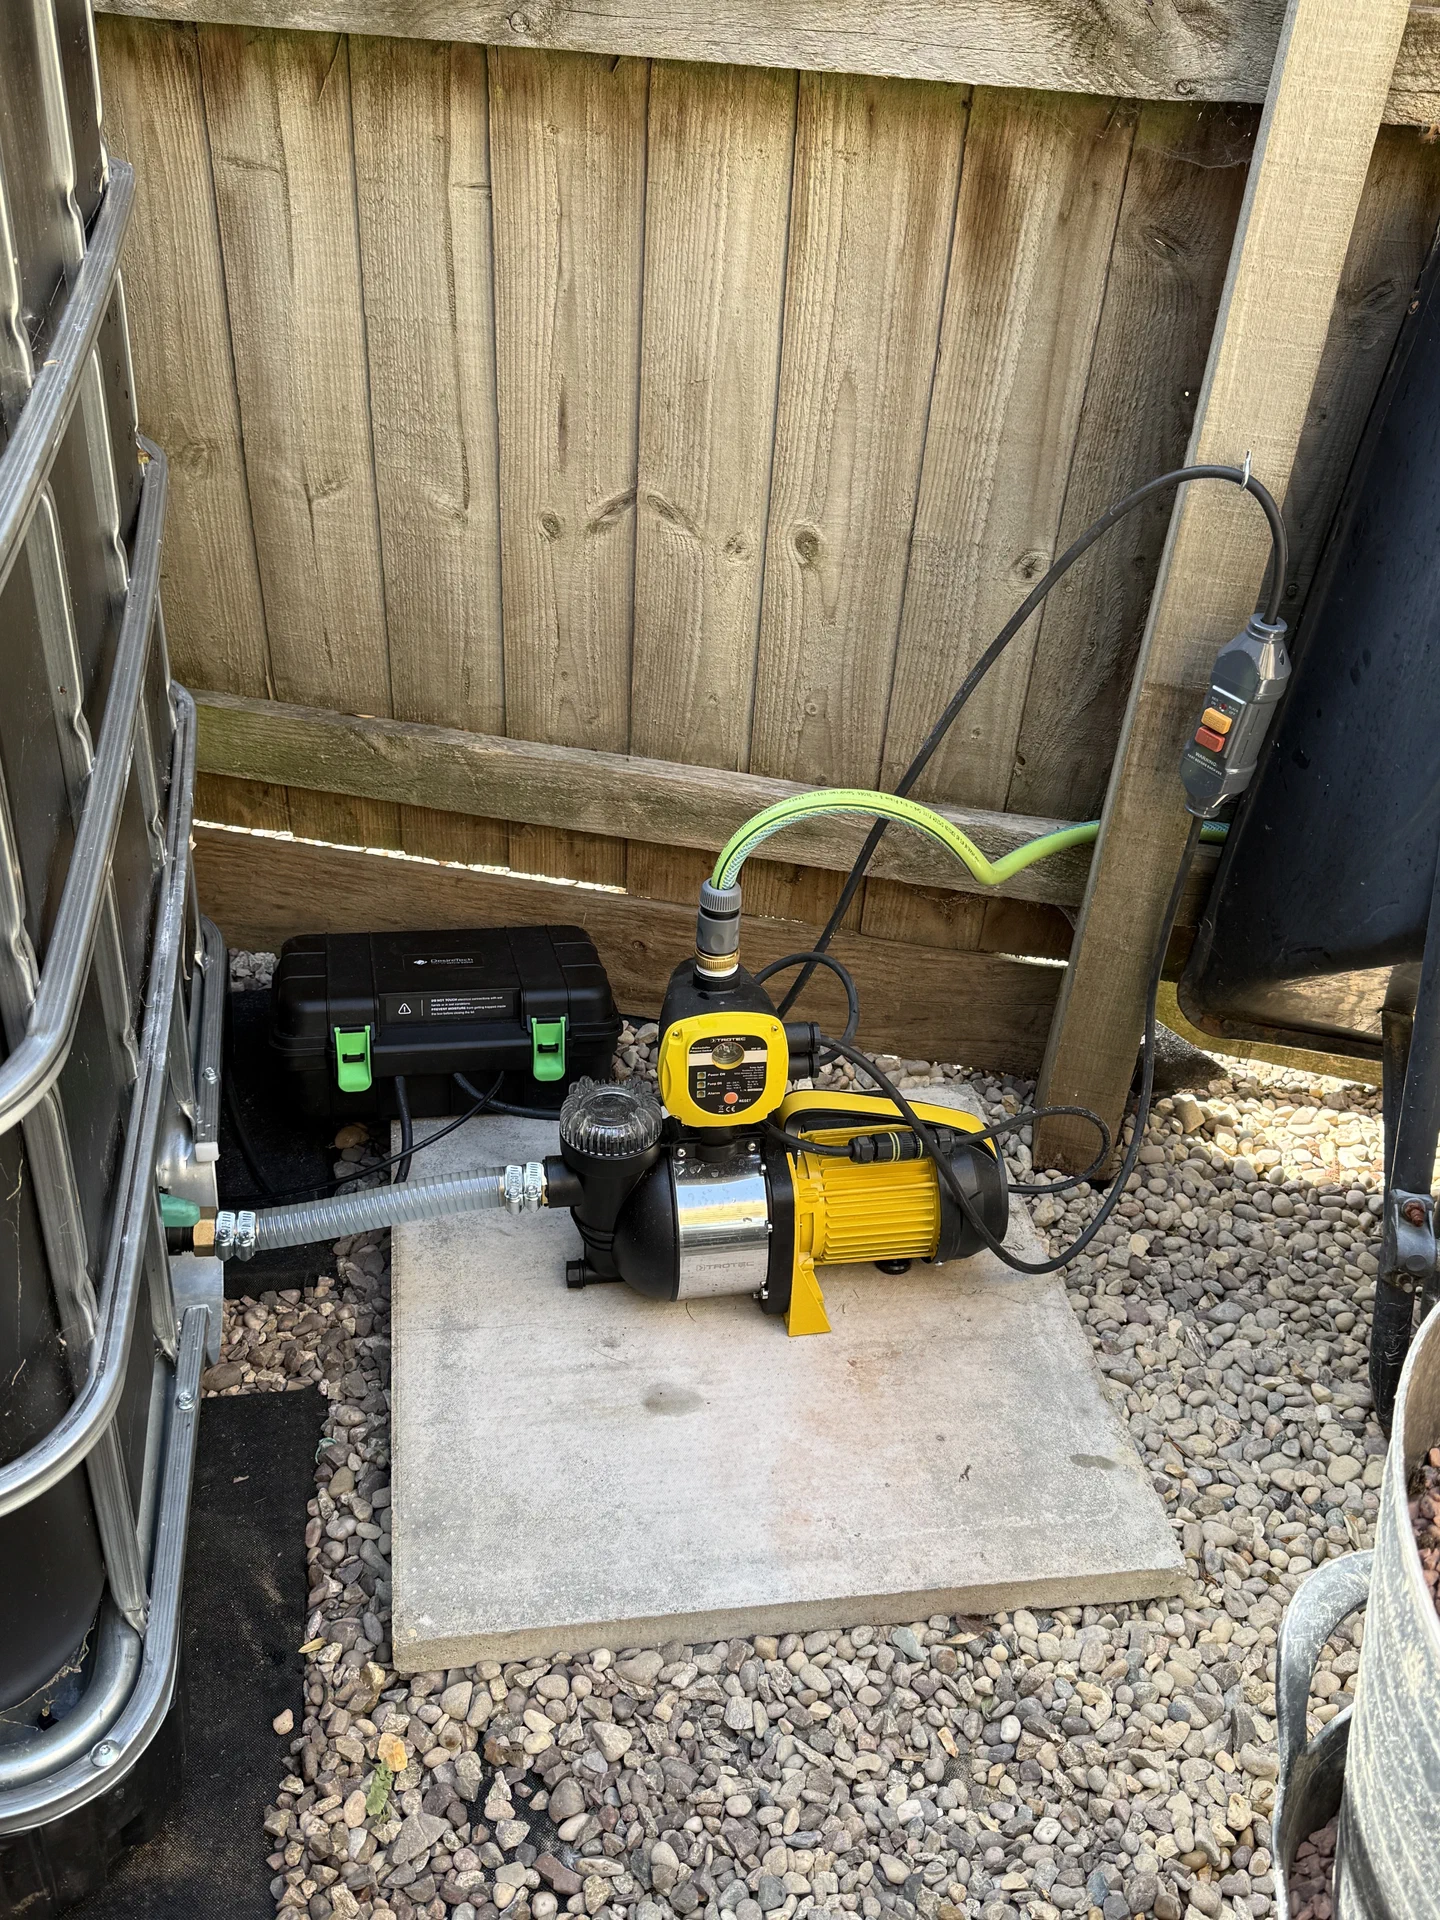
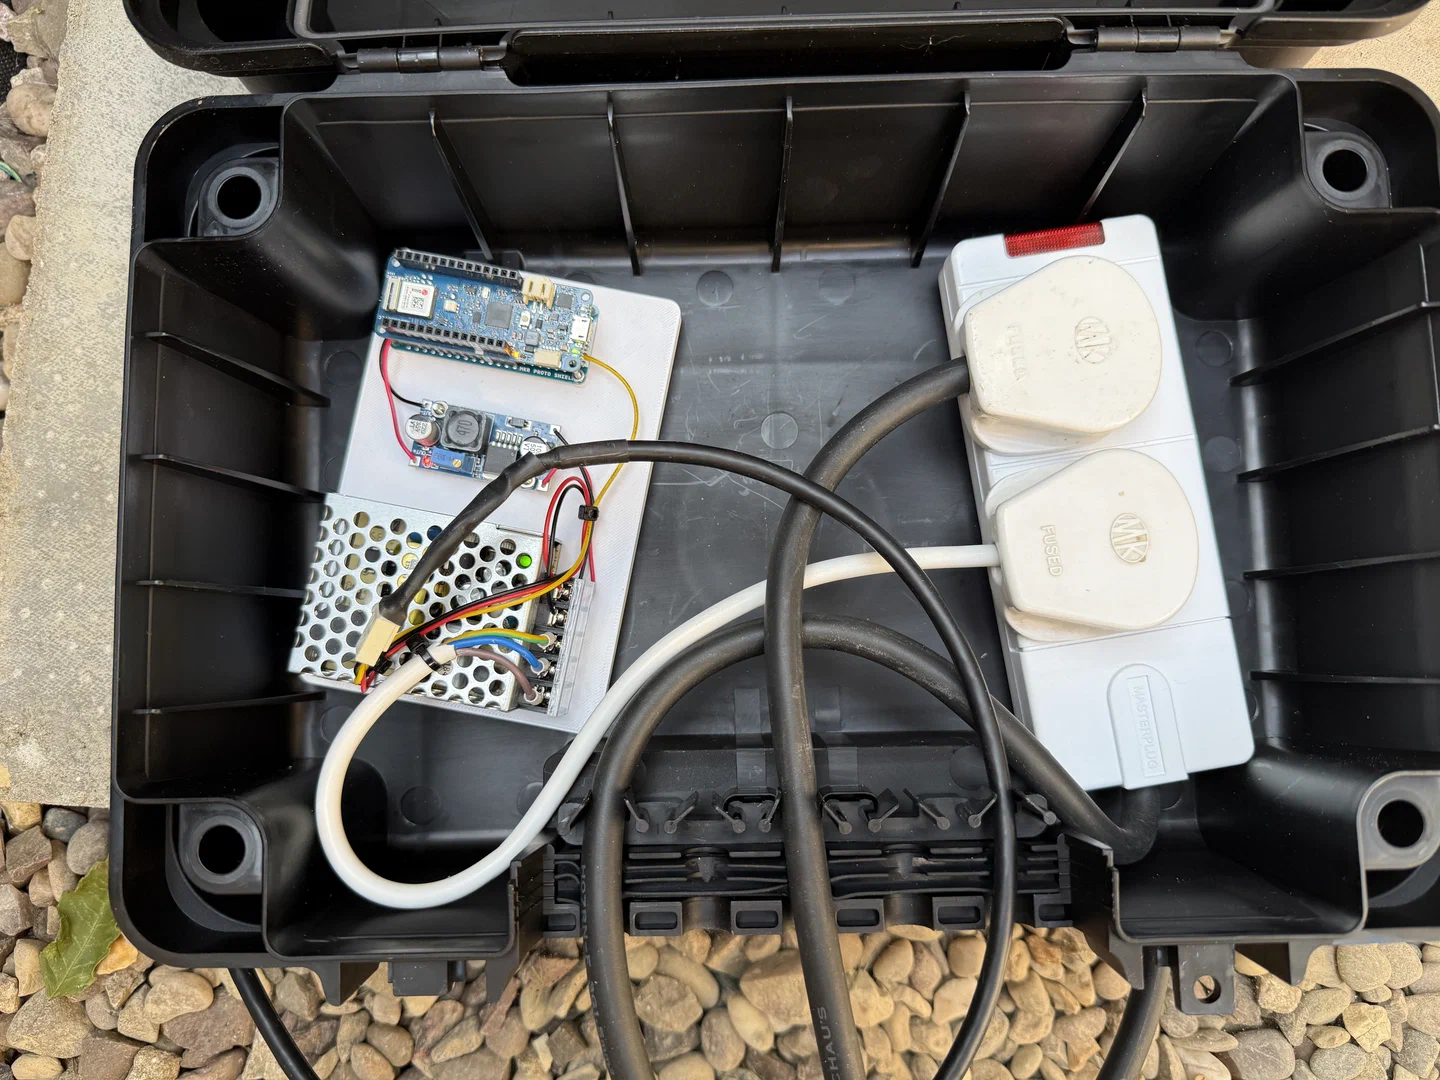
This shows the IBC with pump connected. Valve on top leading to the hose. You can also see an outdoor-rated RCD that I fitted for more safety - it acts as an on/off switch for the pump. The electrical box contains the measuring apparatus. See below.
Measuring
So, the tank is installed, pump is plumbed and it all works well. That should be enough, yes? No. I went on another deep dive after asking myself the simple question “how much water is in the tank?”.
My initial thinking was that I could just ‘dip’ the tank - unscrew the top and put a stick down and see where it was wet. Where is the fun in that? I have a smart home system so it is obvious that I should have a smart level sensor of some kind. After a lot of googling and consulting with the Oracle, I settled on a Chinese sensor (of course) called a DS1603L. This satisfies the main requirement not to cut the tank in any way. It glues onto the bottom of the tank - more on that later - and pings ultrasonic vibes up into the water. These bounce off the surface and the time of flight is measured and converted into a distance.
Add an Arduino with Wi-Fi and some power supply goodness and we have a system that reads the sensor over a simple serial line, converts the value to ‘percentage full’ and sends it to an MQTT1 broker which happens to be my Homebridge2. I built it to be mains powered - a 240V AC to 12V DC power supply for the sensor and a 12V to 5V supply for the Arduino, and put it into a weatherproof case. Fixing the sensor to the tank was not as easy.
Sticking
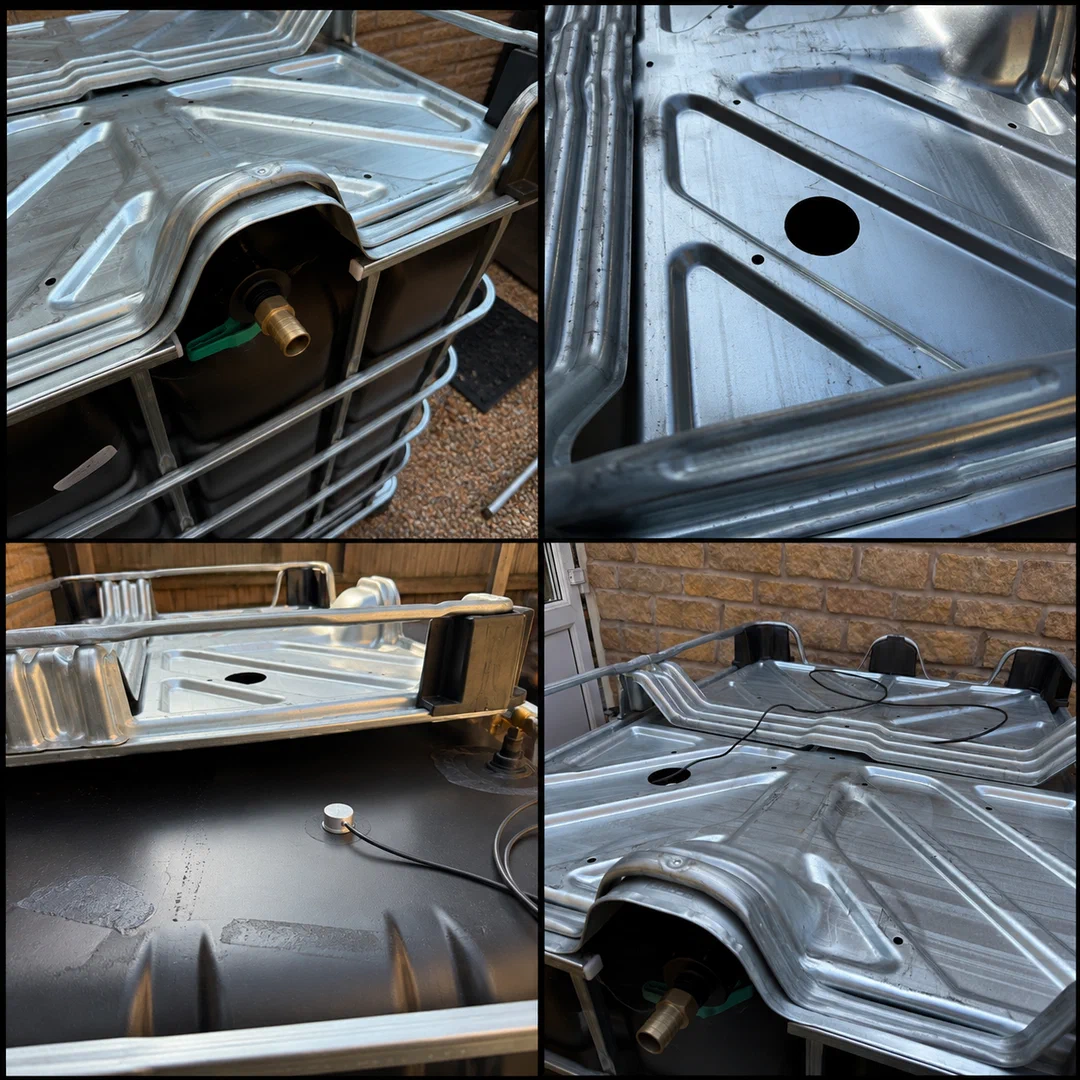
For the sensor to work, it needs to have its flat face pressed firmly against the bottom of the tank with no air bubbles between them. As I want it to work all year round it needs to be firmly fixed. IBCs are made of High-Density Polyethylene - HDPE - famously known for not being easy to stick anything to. The internet dictated that I coarse-sand the surface and then use a blowtorch to heat the surface for a second or two. Then use slow-setting epoxy to fix the sensor. I also had to cut a hole in the pallet base to gain access to the bottom of the tank.
Monitoring
I am happy with the sensor - it works very reliably so far. For fun, I got Claude to build a simple monitor app. This screenshot shows a 2-minute fill from the hosepipe which added about 30 litres.
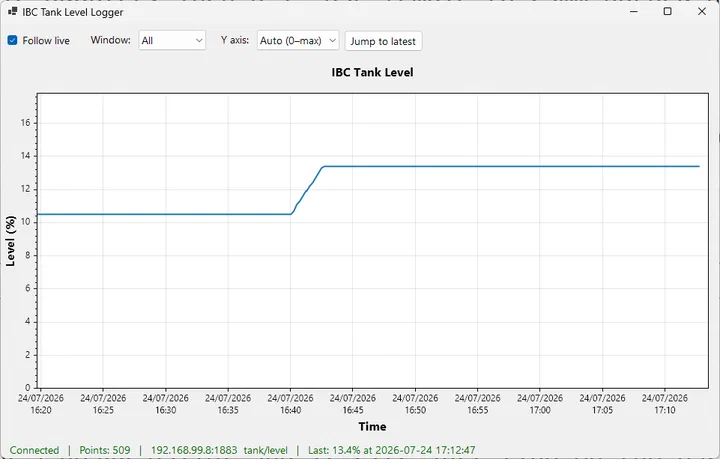
I think it will be invaluable in determining if I need to increase the harvesting capacity. But for now, it needs to rain!
Concluding
This build has been very satisfying. It works exactly as planned and should help us save water and keep plants alive well into the future. Like a lot of projects, it has cost more than expected and taken a lot longer than I thought. It was also a victim of feature creep - but in a good way. Now onto the next thing.
-
MQTT is a messaging protocol where devices publish short messages to named “topics” on a central broker, and other devices subscribe to those topics to receive them — so senders and receivers never talk directly. It’s designed for low-bandwidth, unreliable networks, which is why it’s the go-to for IoT devices like sensors and smart home gear. ↩︎
-
My Homebridge runs on a Raspberry Pi and converts all sorts of IoT devices and sensors to be compatible with Apple Home. ↩︎